Fall Arts + Crafts: Projects You Can Do with Your Special Needs Child

A great way to engage your children is through different sensory projects. Arguably the most enjoyable way to do that is via arts and crafts. You get to have fun using your brain and also come out with some pretty neat memorabilia items to store away and reminisce over later, or eventually turn into holiday ornaments for years to come.
Before we dive into the festive activities, we just want to remind you that we are on Pinterest! Follow us by clicking the button below.
Let’s check out some fun fall crafts that are easy and festive!
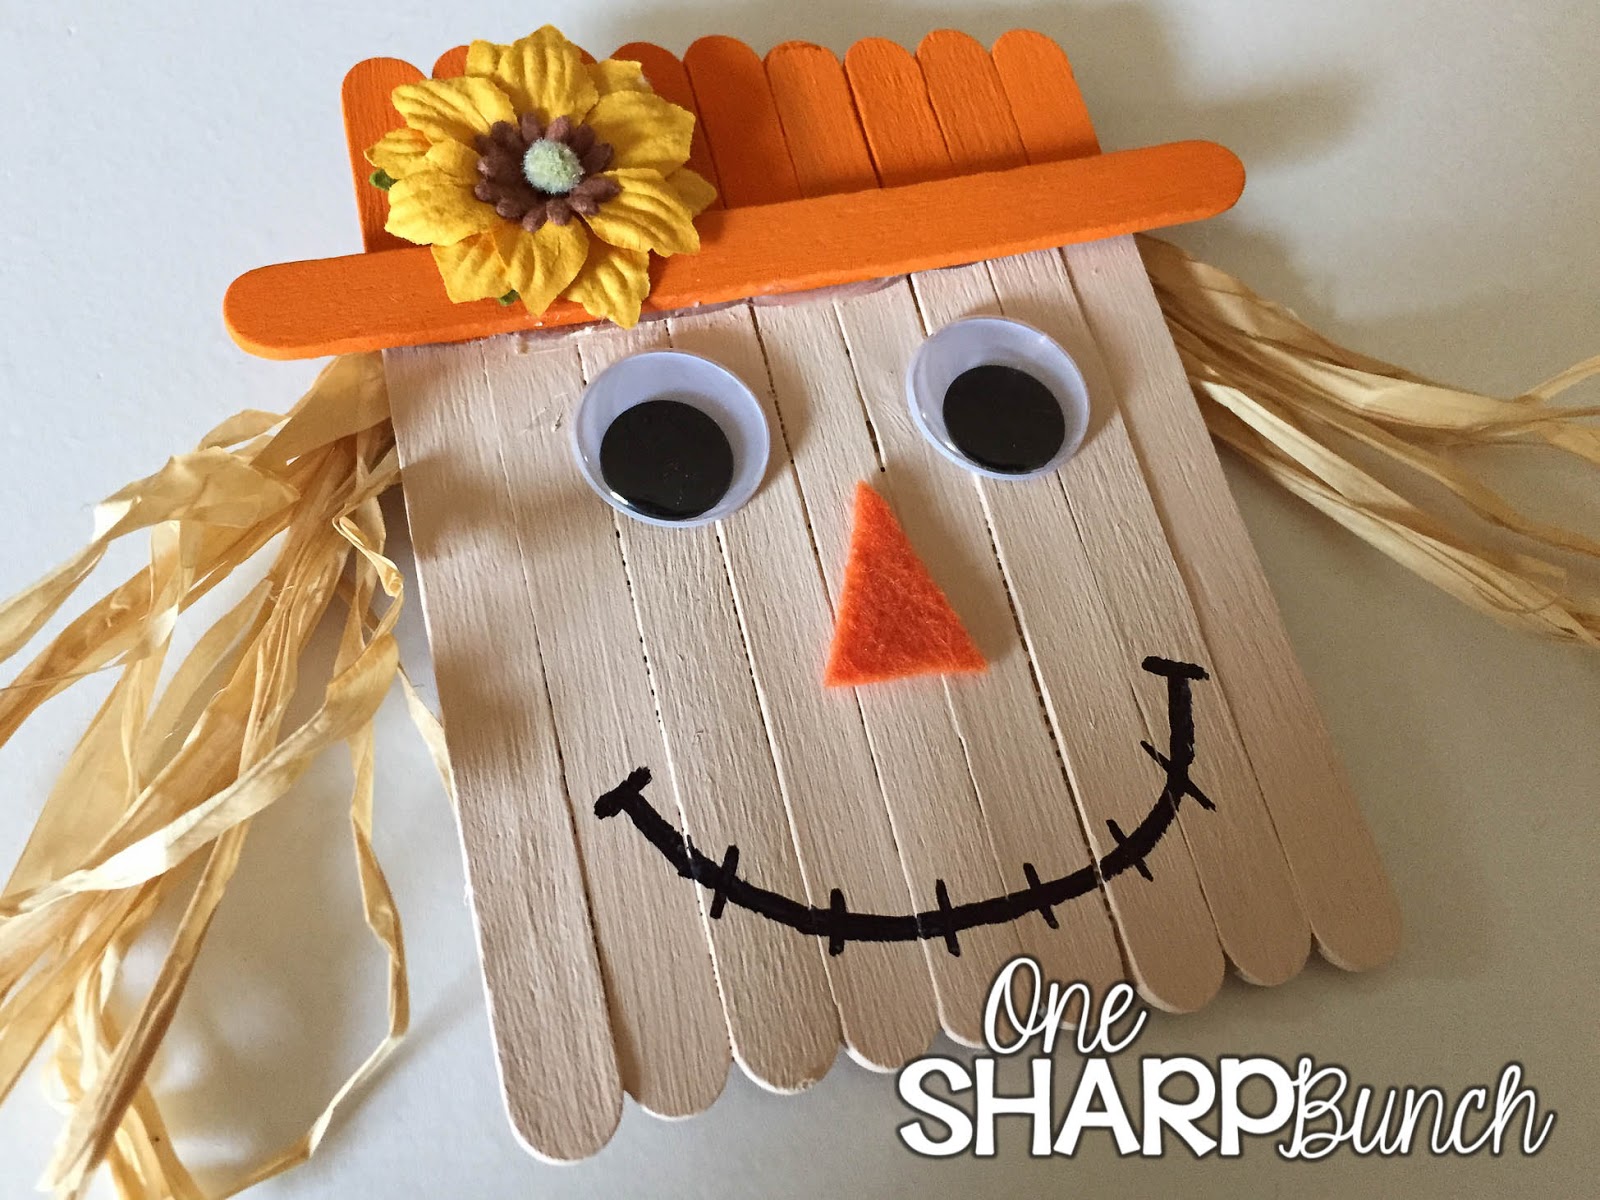
Popsicle Stick Scarescrow
Materials Needed
- 12 popsicle sticks
- Orange paint
- Flesh-colored paint
- Raffia
- Googly eyes
- Orange felt
- Fall flower
- Black permanent marker
- Magnets
- Hot glue gun
Instructions
First, you’ll need to trim two of the popsicle sticks.
- Line up nine of the popsicle sticks to create somewhat of a square.
- Attach the two trimmed popsicle sticks across the back using a hot glue gun.
- Draw a diagonal line across the top so that they know where to paint the orange and flesh-colored paint.
- Paint the remaining popsicle stick orange. This will be used to create the brim of the scarecrow’s hat.
- Attach the hat brim, googley eyes, felt nose, fall flower and raffia hair using a hot glue gun. Draw on a cute scarecrow mouth, and your popsicle stick scarecrow is complete!
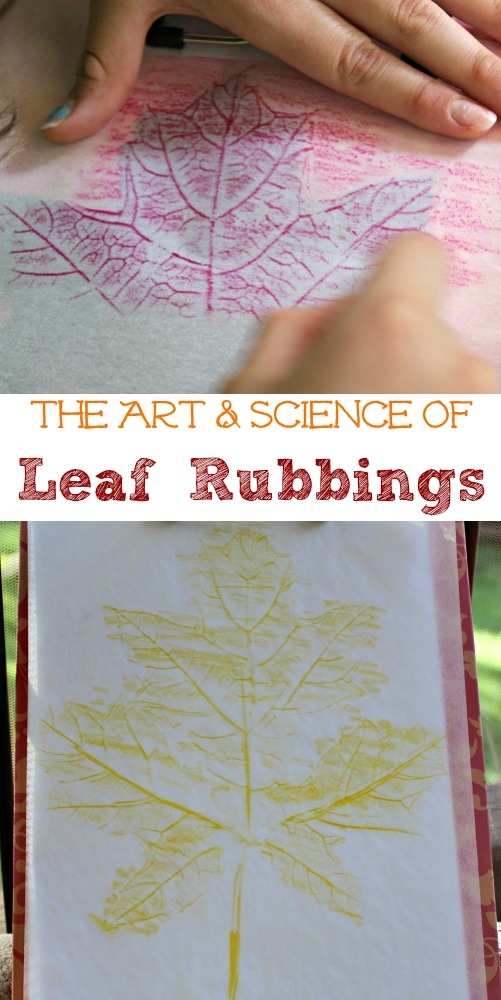
Leaf Rubbing
Materials Needed
- Leaves! larger ones are good and a variety will yield some nice results!
- Tracing paper
- Parchment paper
- Wax paper (this is totally different from parchment paper!)
- Aluminum Foil (also called tin foil)
- Oil pastels (a little like crayons but totally different results!)
- Crayons
- Colored pencils
- a clipboard
Instructions
The steps for this project are a breeze! The different types of paper will produce different images based on what kind of coloring tools are used.
Simply place your leaf behind whichever paper and lightly shade over the outline of it.
The veins of the leaf will be more visible with some combinations of colors and paper than other, or may end up a little blurry.
Once you’ve done this, cut the outlines of the leaf and you are finished! They can be a nice addition to a house or a refrigerator door during fall!
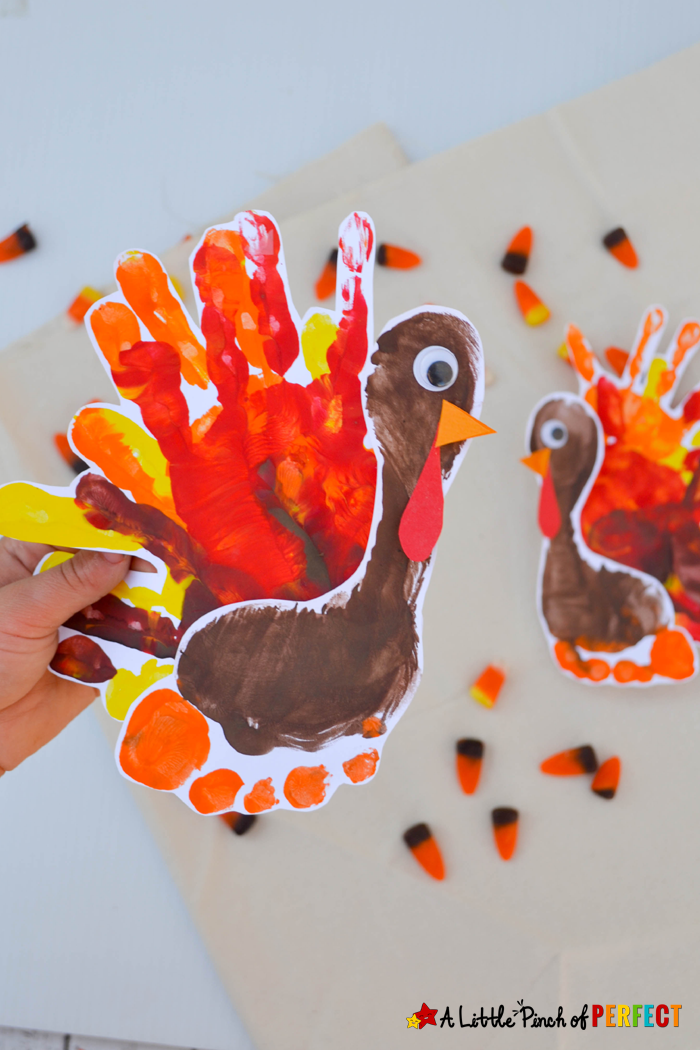
Handprint and Footprint Turkey
Materials Needed
- Red, yellow, orange, brown craft paint
- Paint brushes
- Huggies® Wipes
- Red and orange craft paper
- Googley eyes
- Craft paper
- Scissors
- Glue
Instructions
- Coat child’s hand with yellow paint and firmly press their hand on the paper – Repeat with orange and red paint having them place their palm around the same spot to make the turkeys feathers. You can lay your handprints on top of each other or you could always make 3 individual prints if that is easier.
- Set handprints aside to dry.
- Coat child’s foot with brown paint and toes with orange paint and press their foot firmly on the paper.
- Set footprint aside to dry.
- Cut around the handprints and footprints. Cut a red waddle (tear drop shape) and a yellow beak (triangle shape) and have your child glue them and a googly eye to the heel side of their footprint to make the turkey face.
- Have child glue handprints to the back of their footprint. And you’re all done!
Fall Bucket List
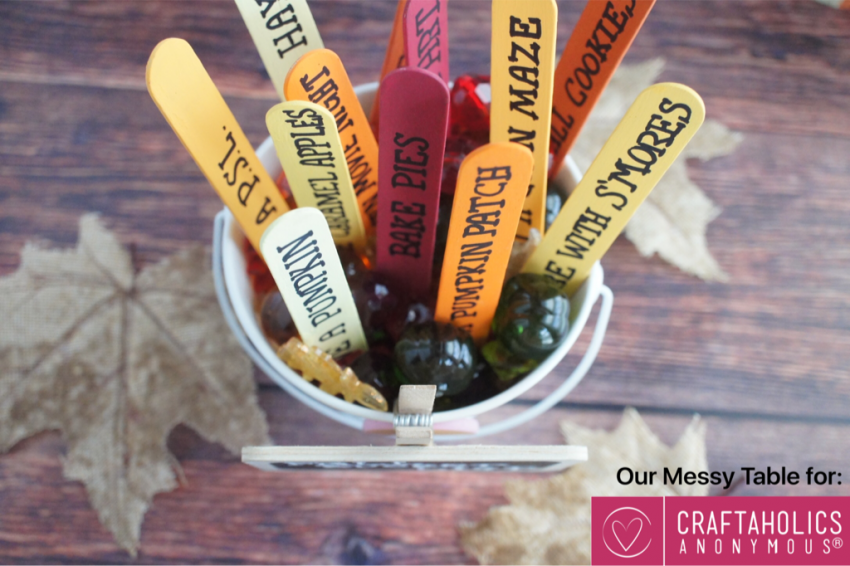
This one is a very simple craft but can really get your child excited for the change in season and give you an opportunity to spend some quality time with them doing things they love!
Materials Needed
- Popsicle Sticks (however many you choose)
- Different shades of fall color paint – orange, yellow, cranberry, cream, etc.
- Small metal Bucket or even a mason jar – it’s up to you!
- Black Sharpie
Instructions
- Ask your child what fall festivities they would like to do throughout the months of October and November and write them down!
- Paint the number of popsicle sticks you need with the different shades of fall paint you chose. Let the sticks completely dry before you write on them!
- Use the sharpie to write down the different activities you and your child can do together on each of the sticks.
- You can either create an additional small sign or write directly on your container “Fall Bucket List” for some added decoration.
- Place the sticks inside your container and anytime you have a free night or weekend, pull one out to determine what activity you and your child can do that day!
- If your sticks aren’t staying straight in the bucket, add some candy corn or some paper trimmings to keep them steady and you have yourself a fun interactive craft that will bring some great fall memories!
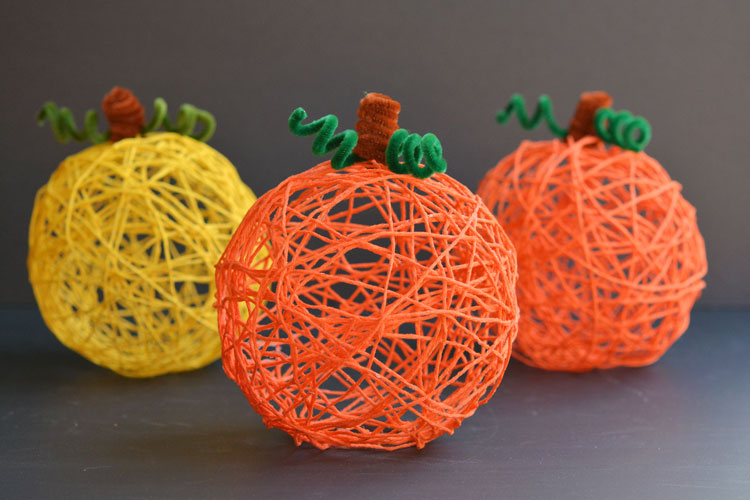
Yarn Pumpkins
Materials Needed
- 21 pieces of orange yarn, cut to 36 inch lengths
- 2 ounces of white glue
- 1 balloon (12 inch size), blown up half full
- 1 brown pipe cleaner and 1 green pipe cleaner
Instructions
- Start by blowing up 12″ balloons about half full. The bigger you blow the balloons, the more yarn you’ll need.
- Cut out about 21 pieces of yarn about 36 inches long. If you make your pieces of yarn too much longer than that, they’ll get tangled when you soak them in the glue.
- Tie one of the pieces of yarn to the end of the balloon. Open one of your kitchen cabinets and hang the balloon from the handle. It’s way easier (and cleaner) than trying to manipulate the balloon when it’s lying on a flat surface.
- Pour the glue into a small bowl. It takes about one full 2 ounce bottle of glue per yarn pumpkin.
- Dunk one of the pieces of yarn into the bowl of glue, and swirl it around gently with a plastic fork to get it completely covered with glue.
- Take the glue covered yarn strand and press the end down somewhere and wind it around the balloon, making sure the press down the ends of the yarn to secure them when they’re in place.
- Repeat with the remaining pieces of yarn.
- When you’re done, find somewhere to hang the yarn covered balloons to dry – It takes a FULL 24 hours to dry and some may drip a little so keep a trashbag or newspaper underneath them as they dry.
- Removing the yarn: You need to make sure you press your fingers down under the yarn to detach the glue from the balloon – around the entire surface of the balloon. It’s a little tedious, but if you don’t do it, the balloon will pull the yarn to the inside as it deflates and it may ruin the shape of your pumpkin.
- Make a very small hole in the balloon close to where the knot is (it won’t pop if you cut it near the knot). You want the air to leak slowly so you can detach any yarn that you might have missed as it shrinks.
- Then pull the deflated balloon out through one of the openings in the yarn.
- Make the pipe cleaner stem and vine by wrapping the pipe cleaners around your baby finger. The stem is just a spiral, so tuck the end of the pipe cleaner into the yarn. AND YOU’RE FINISHED!
Enroll at Our Center
If you want your child or ward to attend be part of a program that stresses the importance of the arts, enroll him or her into classes are our center. Between 3:00 and 6:00 p.m. every day, we have Arts Exploration in which we help our students explore their own creativity and identity through the arts.
Click the button below to apply for our Day Habilitation Program.